
The Top 4 Magic Tips for Better Posies and Selfies

Posies (images that someone takes of you…aka the standard snap of yore) and Selfies (images you take of yourself…made incredibly easier now with the smart phone camera) can make incredible mementoes of wonderful events in our lives such as Weddings, Graduations, Birthdays, Travel shots and the like. My mother is in a nursing home and when I visit, I like to say hello to some of the other residents. I can’t tell you how excited they are to show me photos of their family and their grandchildren. These pictures make their lives so much more exciting. Hence the importance of incorporating these Top Four Tips to secure that magic photo of that memorable experience.
1. Lighting
If you are expecting a definitive on the best lighting for a posie or selfie, you’re not going to get it in this article! Let’s get real. We are in all different types of situations with all different types of lighting, and we can get a great photo in lots of them. The beauty of the digital image is that if you don’t like the photo, hopefully the situation allows for a do-over right then and there!

Natural lighting can be great. It doesn’t necessarily mean outdoors. Could be indoors like the photo above. I took the above photo of my husband’s 98 year old grandmother with my iPhone X. The lighting was pretty darn good, and what additional bits of editing I had to do, I did on the phone in the Photos app!
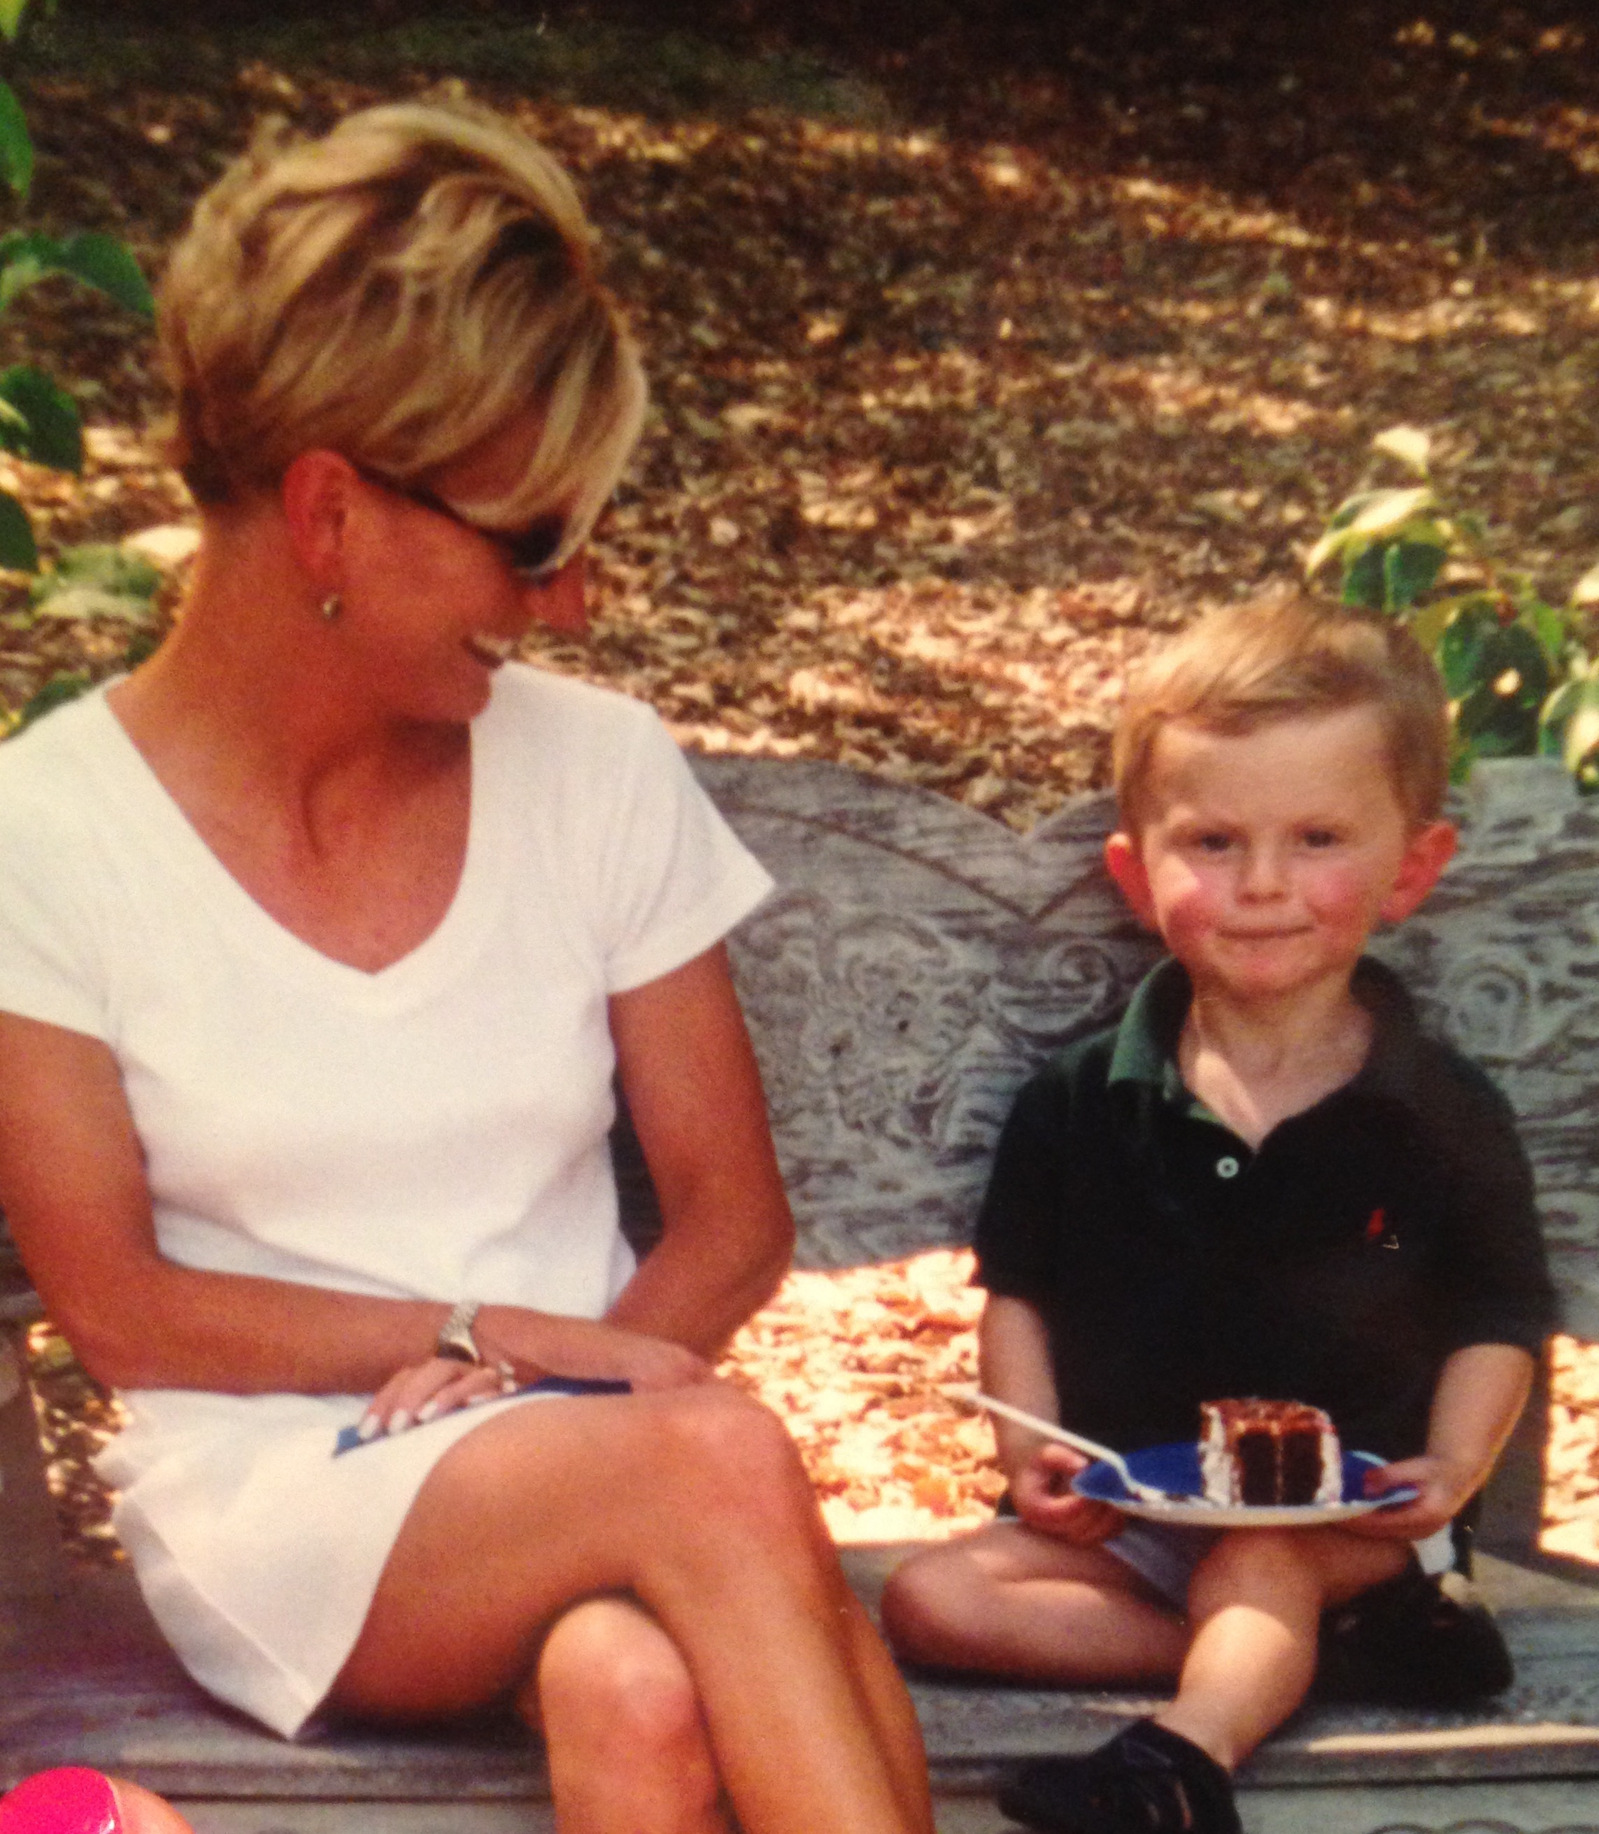
Outdoor lighting during the day can be wonderful too. The image above is an oldy but goody of my son at a friend’s birthday party. The lighting is afternoon summertime, with partial shade from a tree.
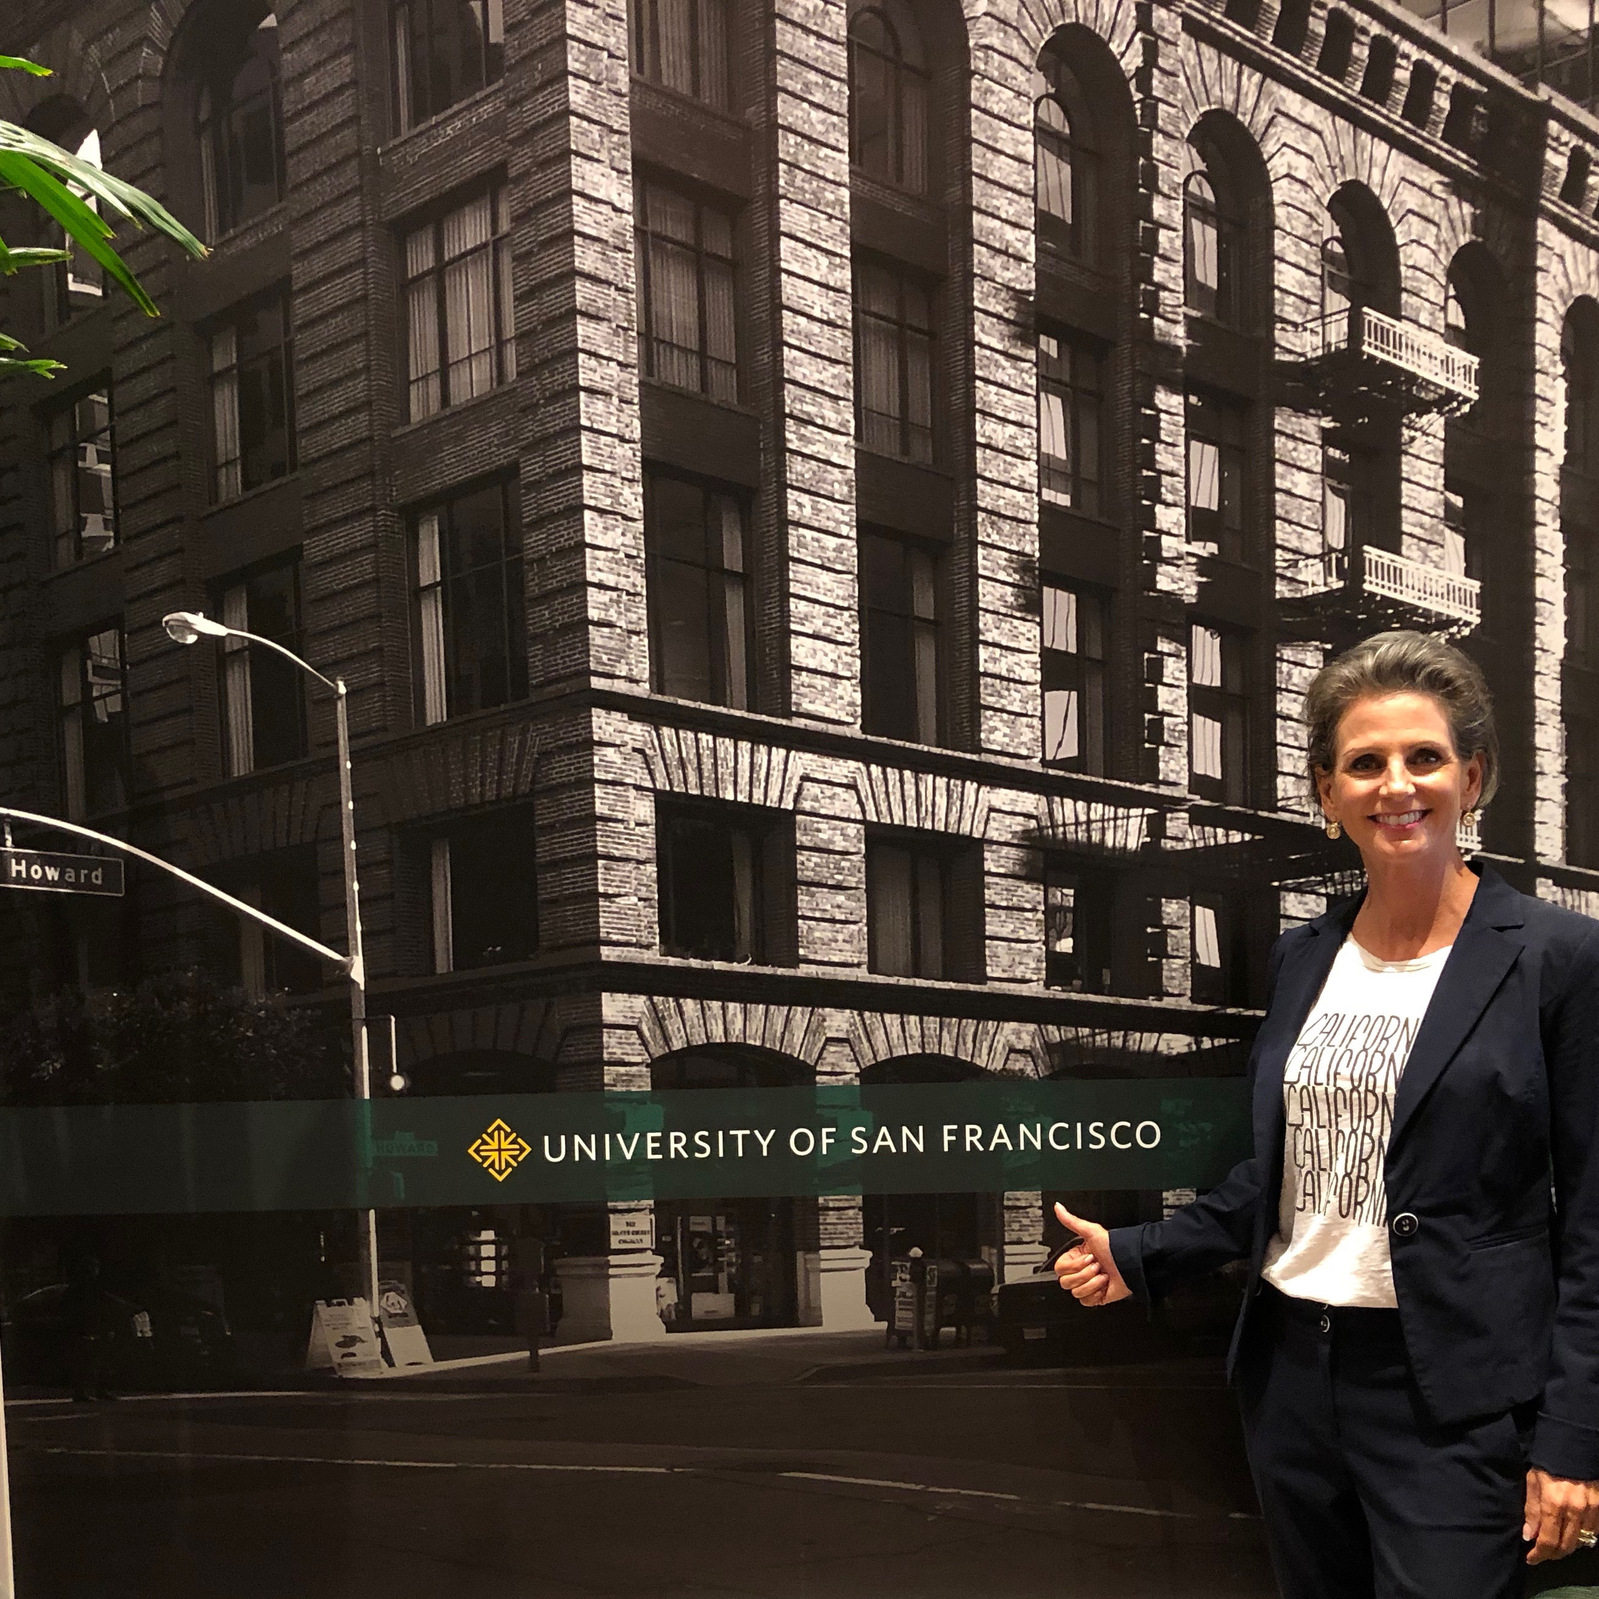
Don’t let anyone shoot you in bright 12 noon light. No one looks good with lighting directly overhead, whether it’s from the sun or from an indoor canned lighting in the ceiling of someone’s home. Lighting directly above you casts unflattering shadows as you can see in the photo of me at my presentation to a class at the USF School of Management. You can barely see my eyes and the shadows make me look like I have huge bags under them! Try this trick: turn around in a circle until you find the best lighting before taking your photo. Still having trouble with lighting? Put a piece of white paper under you to bring more light under your chin area and brighten up your eyes and face. And yet still having trouble? Adjust the exposure of your camera before you take the photo! To change your mobile camera’s exposure by hand, open your camera app and tap the screen. When you see the lens refocus, you’ll see a very small sun icon and a vertical scale. Slowly swipe your finger up and down this scale to adjust the light level.
2. High or Low? Know Yourself and Know Your Angles
The common word on the street is always take your photo from an “above” angle. You hear it all the time. People even yell at the poor volunteer roped in to taking the photo, “raise the camera up”, “higher duh!” Well that’s just not always true. It totally depends on you and the angles of your face that you like and you desire. Check out this photo for proof that low angles work too:

But you will never know what is right for you, until you know yourself image wise. I recommend going through a bunch of photos of yourself on your phone or computer and “favorite-ing” the ones you like the best. Now go back and select to view just the favorites. What are some common themes? Are you looking straight on at the camera, or are you looking at a 45 degree angle? Do you have a “lazy eye”? Do you like one side of your face better than the other?

When I did the above “favorite-ing” exercise, I realized that I like myself in photos when I am looking straight ahead at the camera. I like my body slightly turned, but my face straight on. So I don’t care what side someone stands on next to me. However, many of my friends have a particular side of their face or angle that they prefer. So they know to position themselves in a photo with others, such that their face is angled with their preferred side to the camera. Also if you have lazy eye, or feel that one eye is smaller than the other etc, its often best if that eye is closest to the camera. I.e. the smaller eye would be closer to the camera as it will appear larger.
3. Check for Good Background

While I think the above picture is really good…there is one part that really bothers me (I took the photo). It’s the lamp “growing” out of my Dad’s head. If I had used Portrait mode on my iPhone app, I could have blurred the background out more, but really if I had a better eye at the time, I could have set the picture up noting that issue.

Don’t underestimate the plain wall or background for a great photo. Especially to commemorate important situations like graduations, or anniversaries (this one above). Especially if you can get some texture to show. It softens the photo, but it doesn’t distract the eye of the viewer.
4. Practice Posing
This is such a huge one. I can’t even tell you how important it is for you to “warm up your smile” before a big event. I tell all my brides to start practicing months ahead in the mirror. You’ve just got to get comfortable with smiling and looking your best in a photo. There is nothing worse than the one family member who won’t cooperate and ruins the whole photo. I know it can be uncomfortable, but it’s not vain to want to look your best in a photo that might live on for years in Grandma’s room in the nursing home. If not for yourself, then for Grandma!

As you practice, remember to relax. What makes you relax? Generally thinking about pleasant thoughts of something funny. I often ask my portrait subjects “to think about your next vacation…” or “think about someone you love” and then as soon as they start to smile, CLICK. If you are standing there in a large group, with someone taking multiple group pictures, try to think about pleasant things, and keep smiling for a few seconds as hopefully they are taking a few! And what about “smizing” or “smiling with your eyes”…it’s a great tip or trend started by the model, Tyra Banks.

The idea is a good one, but sheesh it’s difficult to perfect. Let’s leave it to the professionals shall we? The best recommendation I can give you is to laugh inside, giggle, relax, look down and then snap those eyes up at the camera when the person says they are about to shoot. It’s natural and will get you super close to smizing!
And there you have it. My Top 4 Magic Tricks for Selfies AND Posies alike.
Like what you are reading? Click here to sign up for my periodic newsletter that links to popular stories on my blog.